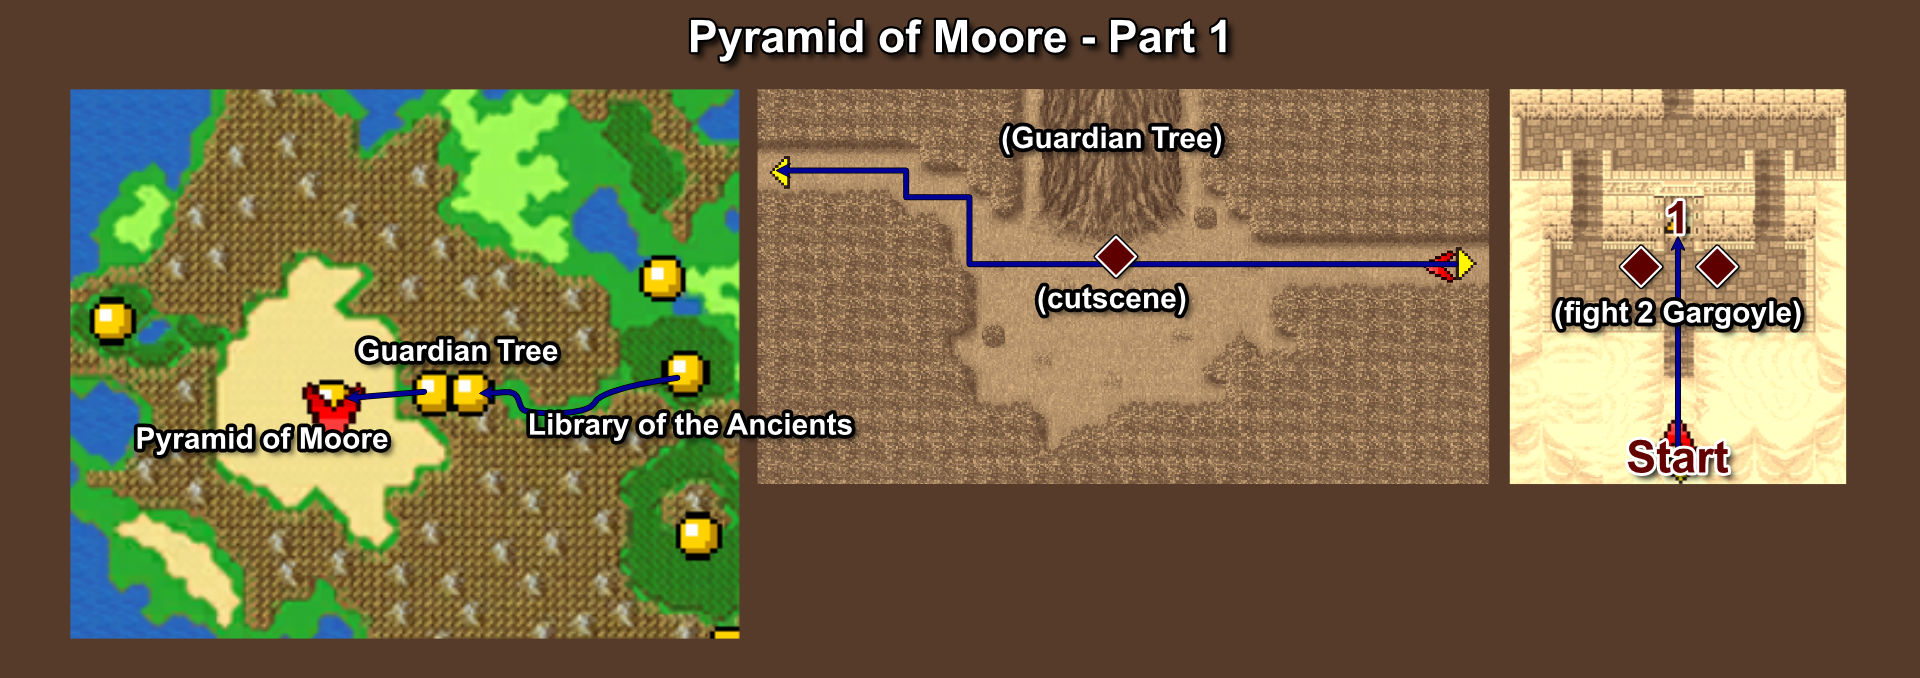
From the Library of the Ancients, go north.
Run through Guardian Tree (it looks like a Chocobo Forest).
Then enter the desert for a short dialogue. Enter again to reach the Pyramid of Moore.
Before you can enter, you'll have to defeat the guardians first, Gargoyle x2. The thing is, if you kill one Gargoyle, the other one will revive the other on the next turn. So you have to kill them both at once or one after another immediately.
The quickest spell to kill them is Level 3 Flare. You can also use Break to instantly kill them, but you have to time both Black Mages to cast 2 Break one after another IMMEDIATELY.
Bestiary Checklist:
Item Checklist:
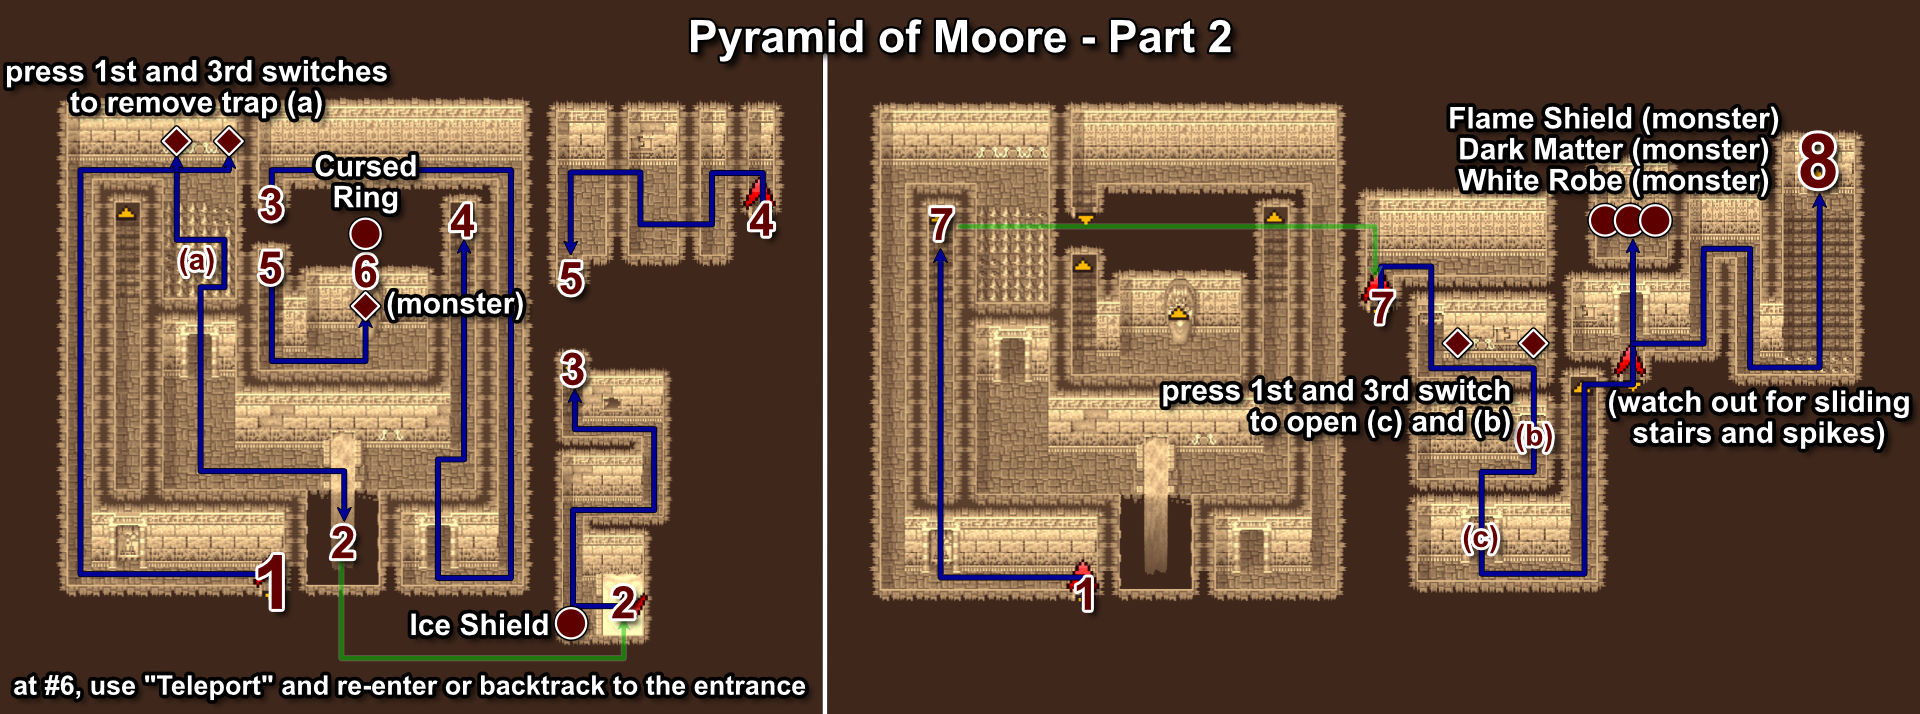
- C-132: Ice Shield (Monster: The Damned x4)
- C-133: Cursed Ring (Monster: Grand Mummy)
- C-134: Flame Shield (Monster: The Damned x4)
- C-135: Dark Matter (Monster: The Damned x4)
- C-136: White Robe (Monster: Archeosaur)
This dungeon has so many traps inside.
On 1F, press the 1st and 3rd switches to disable the spikes, then jump into the water to B1.
Once you get Cursed Ring, use Teleport (Time Mage) and re-enter the pyramid; it is faster than backtracking to #7.
On 2F, press the 1st and 3rd switches to open the 3rd and 2nd doors.
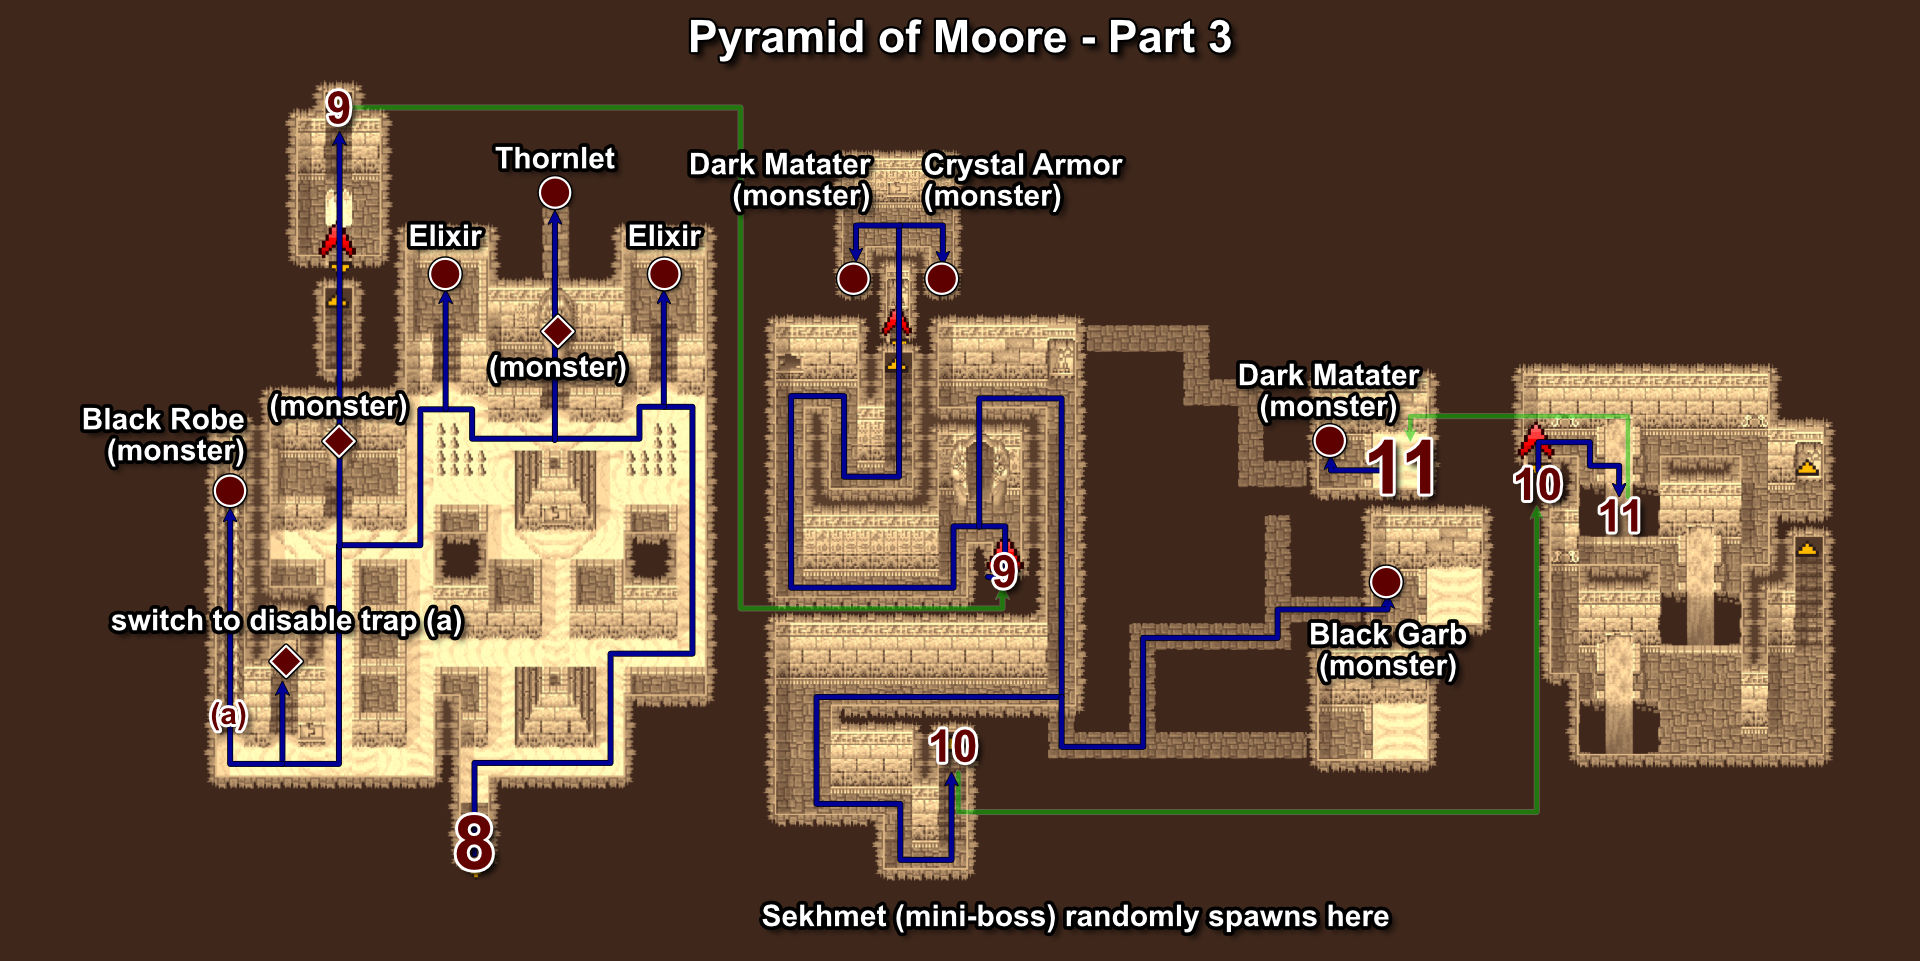
On 4F (#8), there are no random encounters. However, it is overrun by Mecha Head. Killing them doesn't give you anything, so it's better to just kill one for bestiary and avoid them.
On 5F (#9), there is a random-encountered mini-boss Sekhmet. You won't be able to encounter it again after killing it.
On 6F, step into the water stream #11 to fall onto 5F to pick up the last chest.
Item Checklist:
- C-137: Elixir
- C-138: Thornlet (Monster: Mummy x3)
- C-139: Elixir
- C-140: Black Robe (Monster: Ushabti x2, Archeosaur)
- C-141: Dark Matater (Monster: The Damned x4)
- C-142: Crystal Armor (Monster: Objet d'Art x5)
- C-143: Black Garb (Monster: Steel Fist x3 or Bandercoeurl x2, Black Warlock)
- C-144: Dark Matater (Monster: The Damned x4)
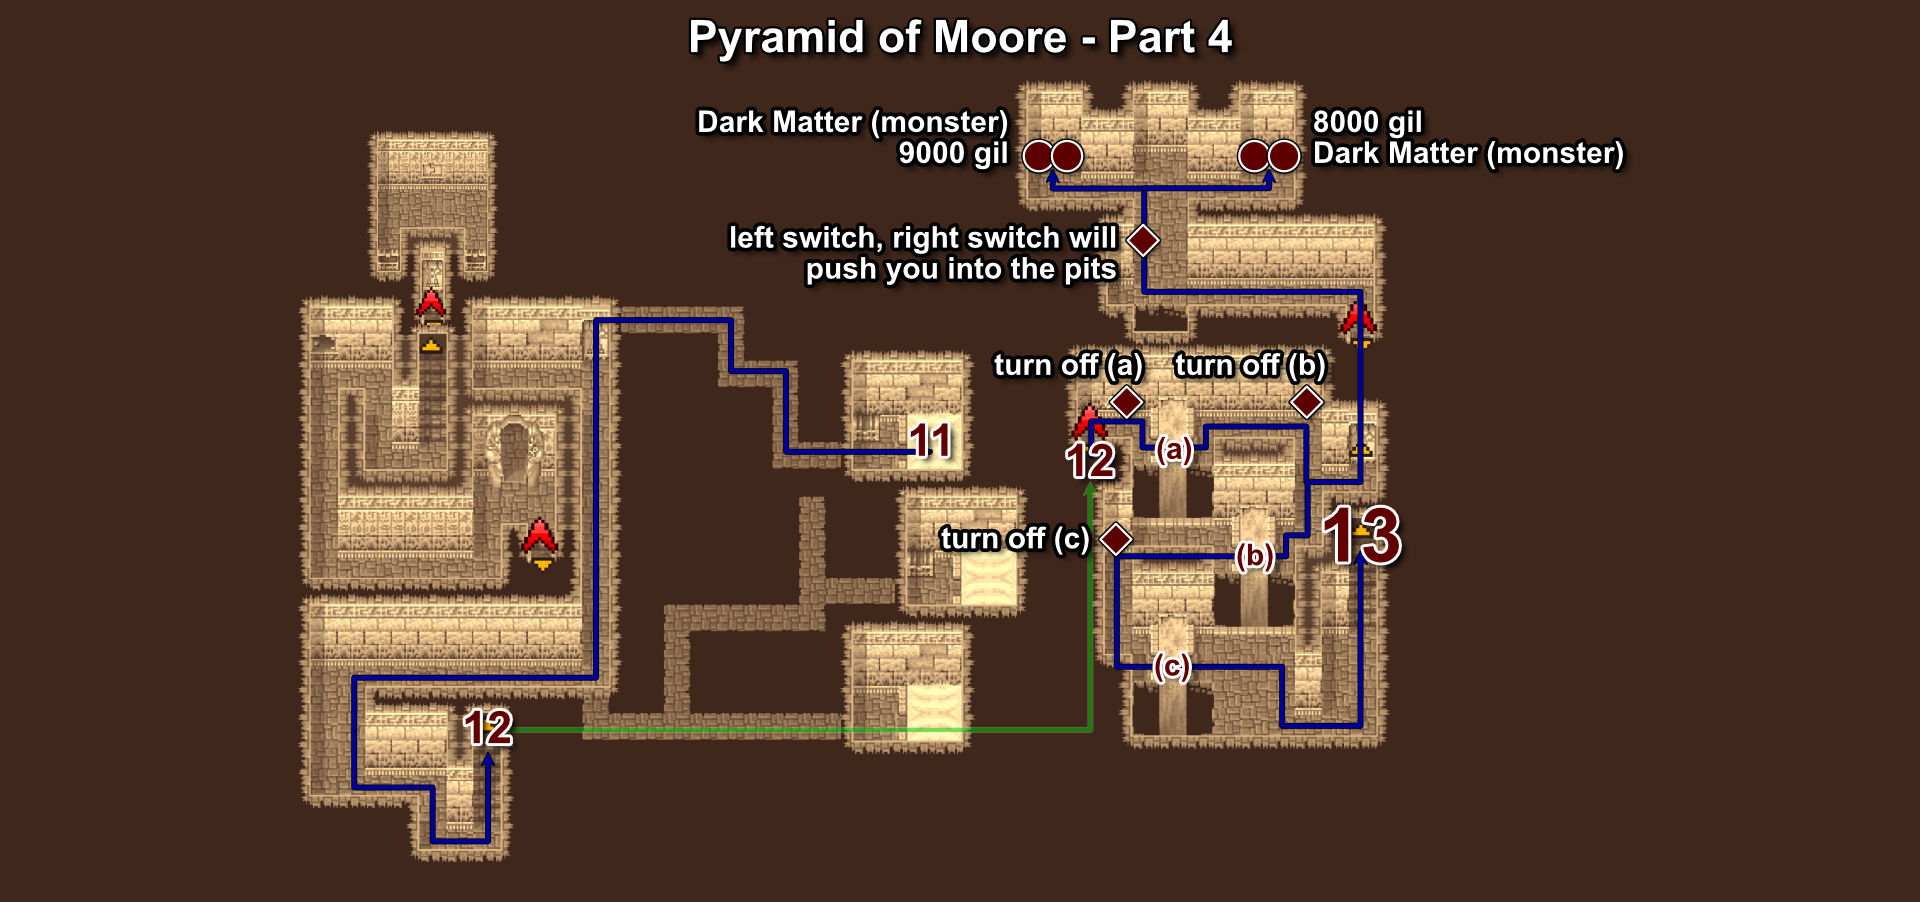
On 6F, inside the treasure room, press the left switch to open the path. The right switch will push you down the pit.
Item Checklist:
- C-145: Dark Matter (Monster: The Damned x4)
- C-146: 9000 gil
- C-147: 8000 gil
- C-148: Dark Matter (Monster: The Damned x4)
On 8F, some tiles are flipping, but I marked those that do not flip with a square.
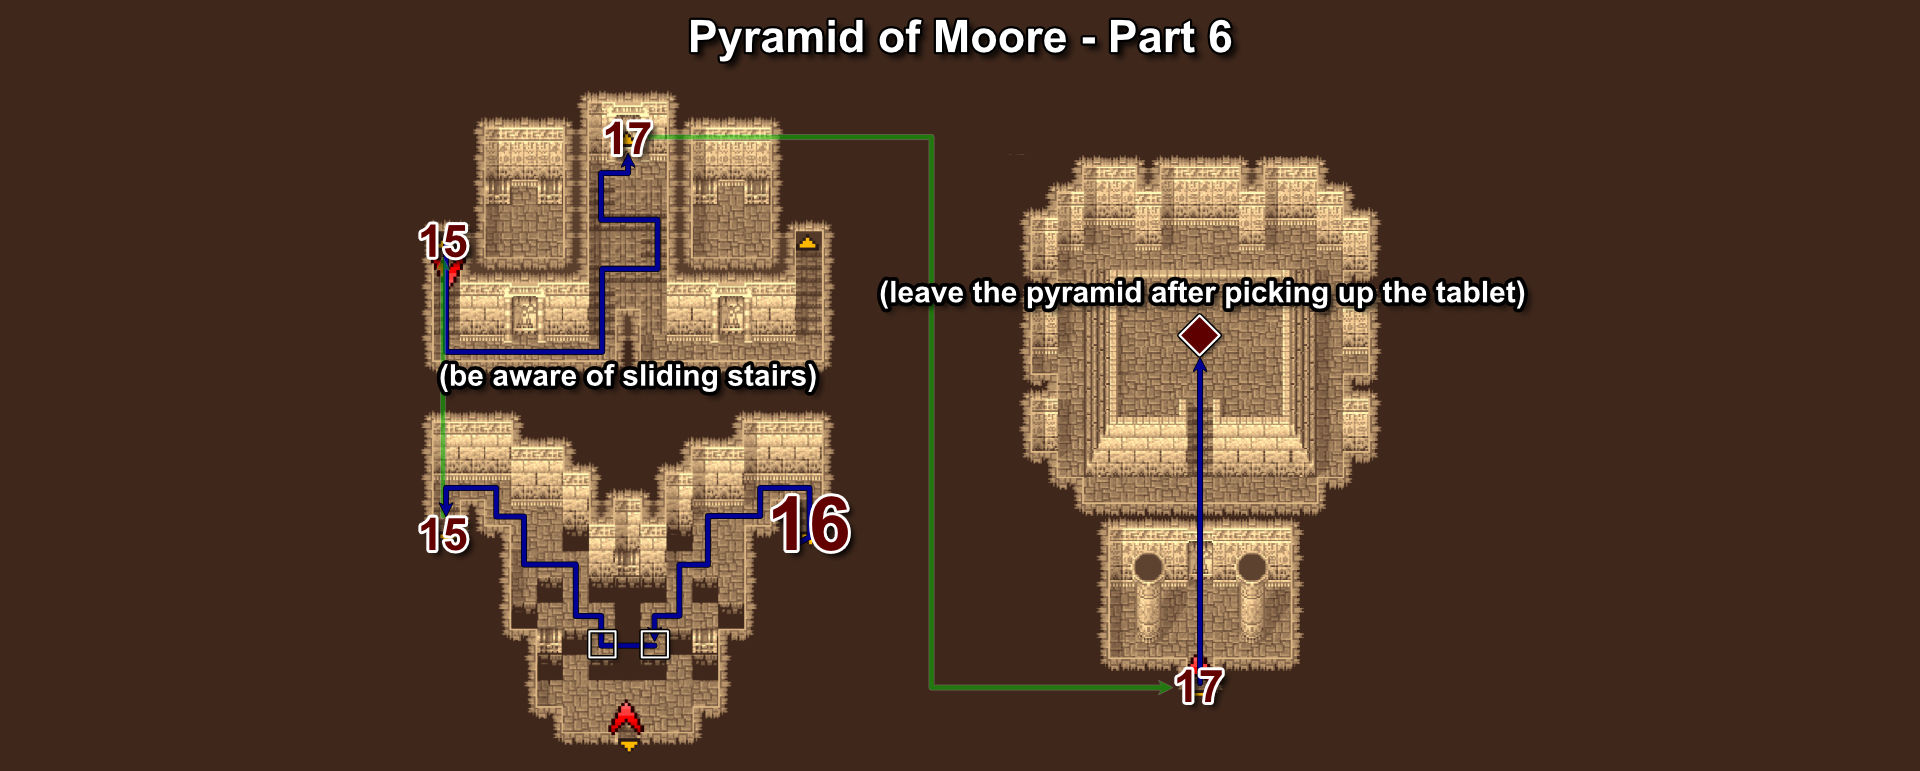
On 7F (between #15 and #16), the sliding stairs prevent you from crossing back to the left side. You'll have to come back through 8F again to enter the middle door.
Item Checklist:
- C-149: Gaia Hammer (Monster: The Damned x4)
- C-150: Elixir
- C-151: 10000 gil
- C-152: Cottage
- C-153: Ribbon
- C-154: Protect Ring
- C-155: Gold Hairpin
- C-156: Elixir
- C-157: Dark Matter (Monster: The Damned x4)
- C-158: 12000 gil
- C-159: Dark Matter (Monster: The Damned x4)
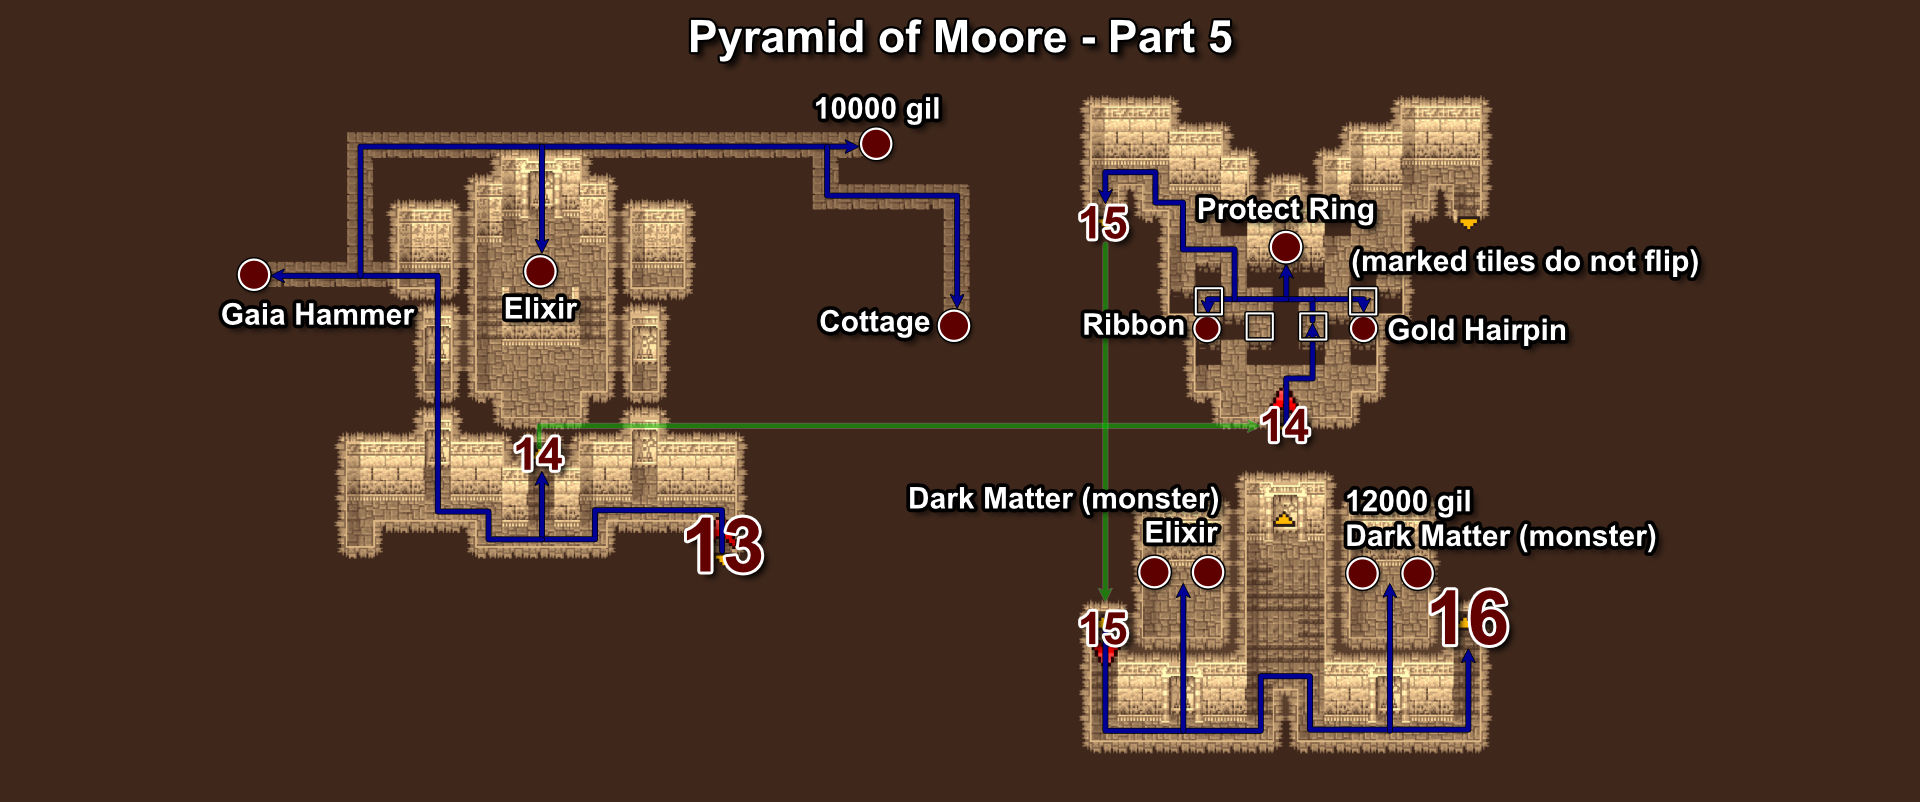
Make a circle back to #15 and be careful with the slopes when going upstairs.
There is no boss in the final room.