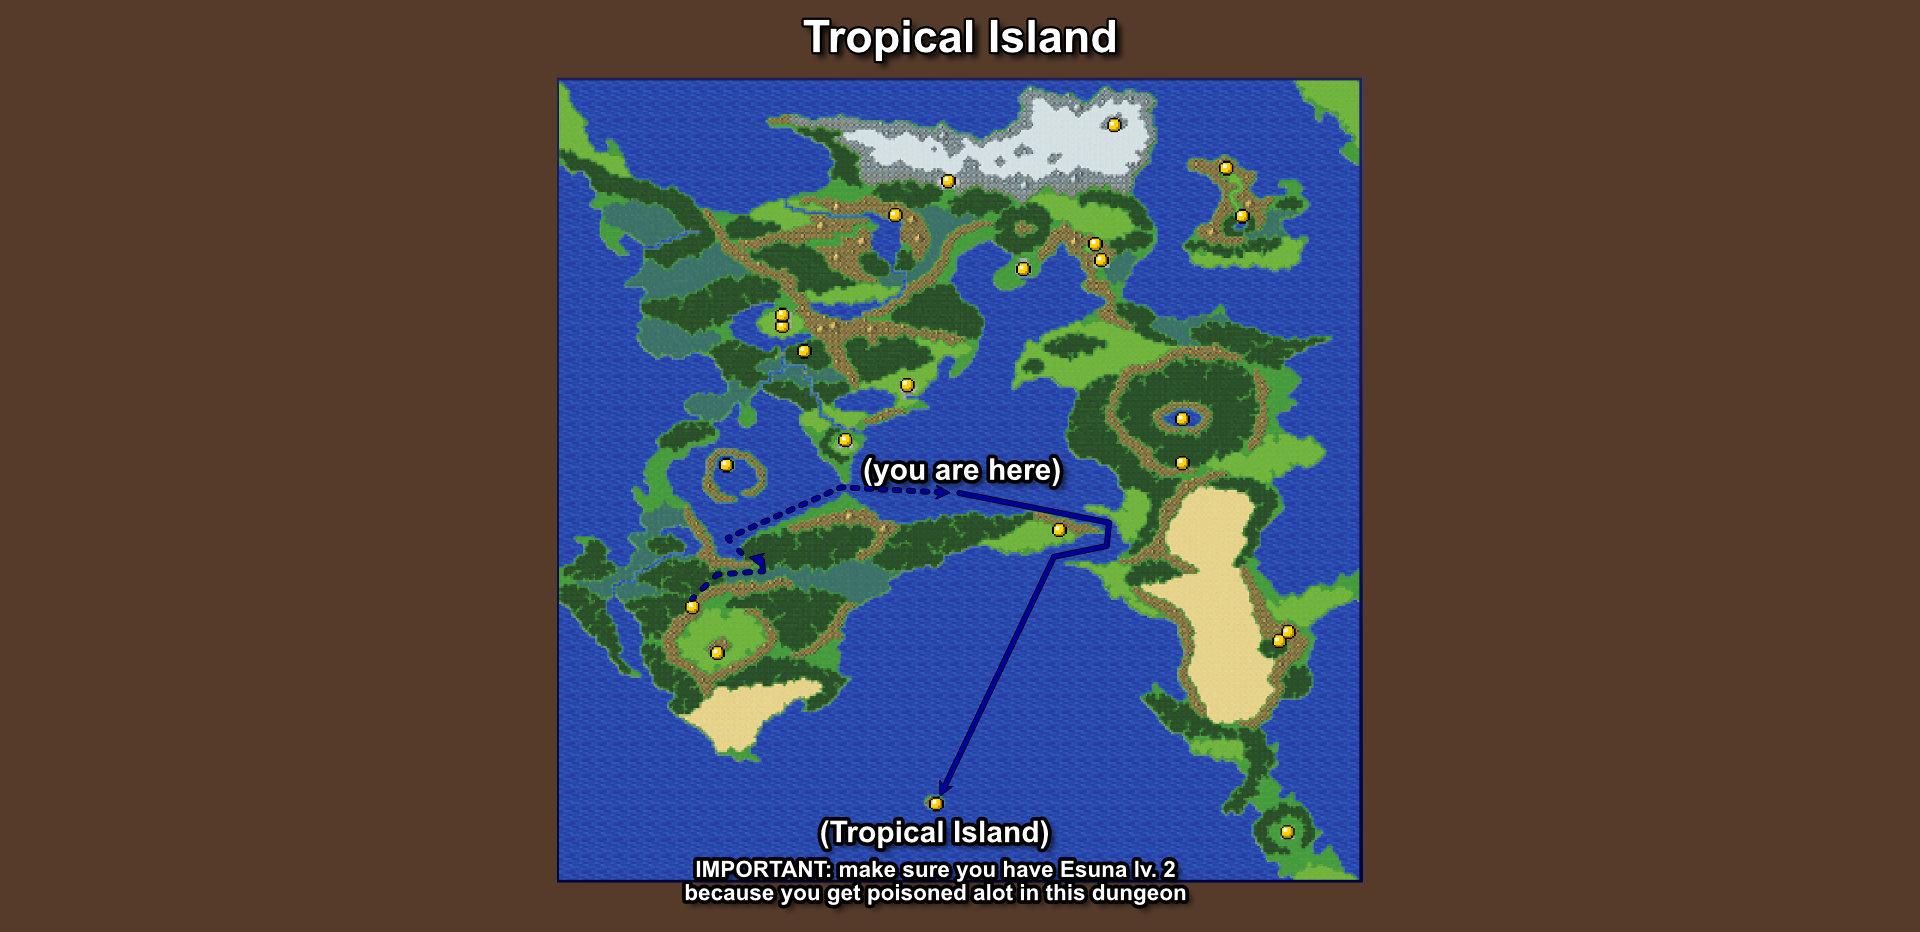
This is very a tiny remote island in the south, you can see a very small dot in the middle of the ocean in the world map.
IMPORTANT NOTE: make sure you have Esuna level 2 because you'll get poisoned a lot in this dungeon.
Bestiary:
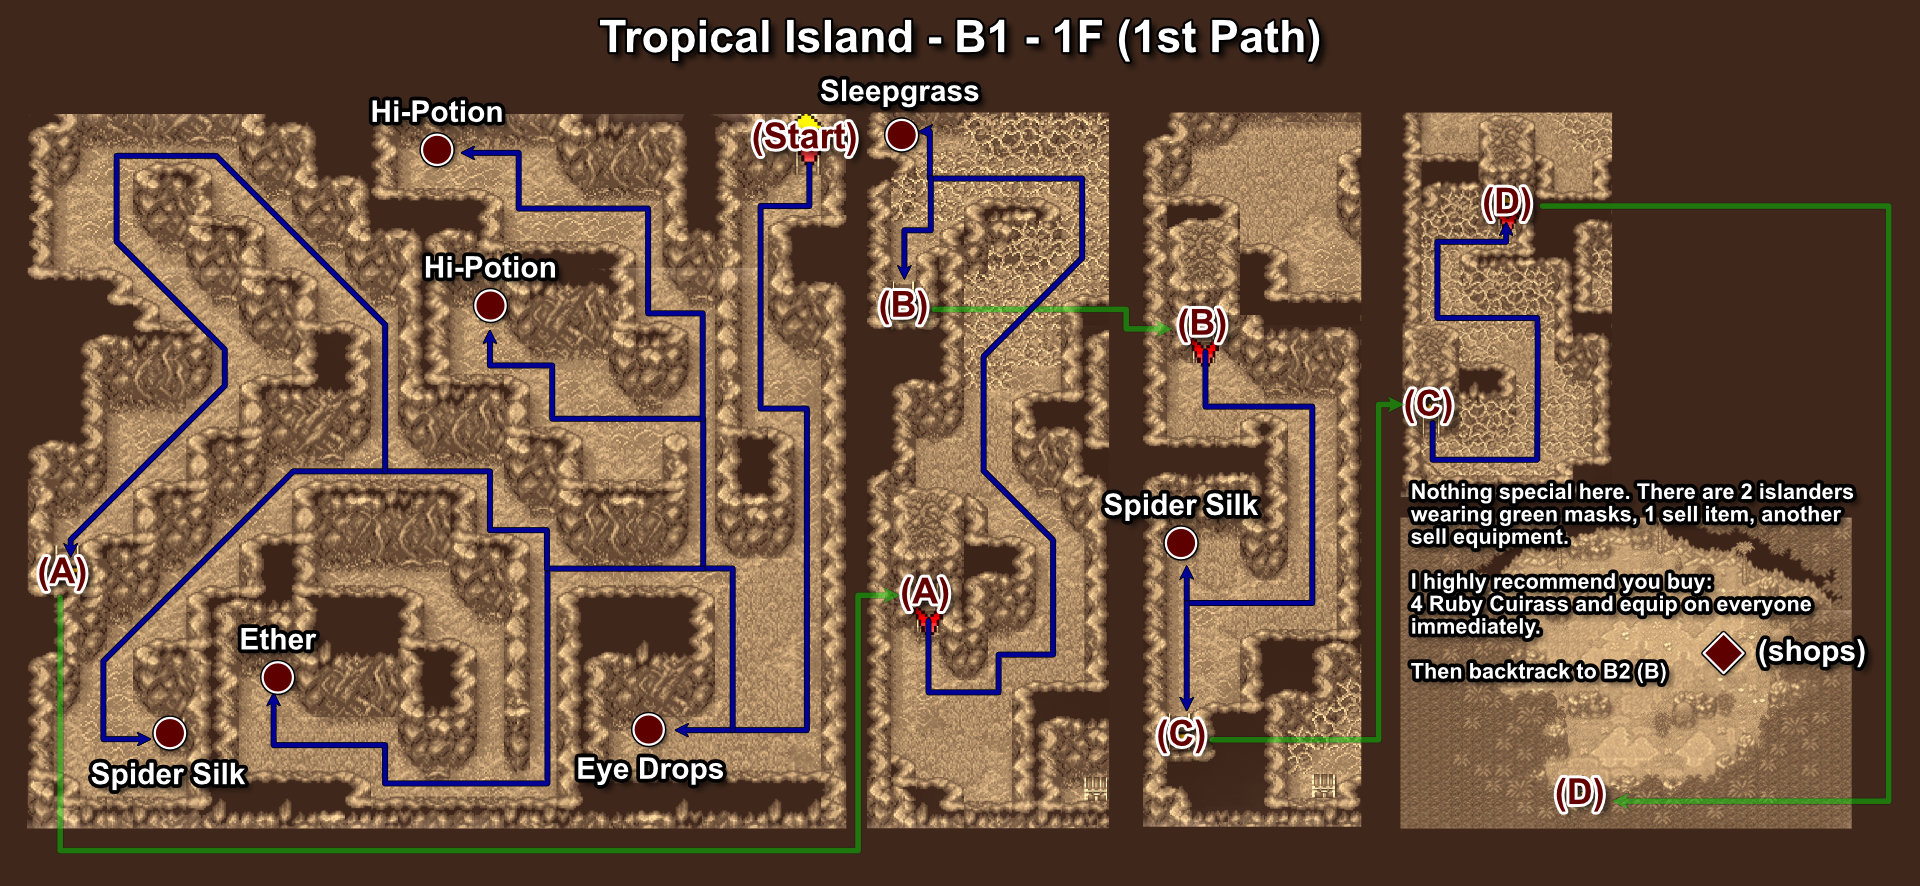
- C-111: Eye Drops - Bottom-right corner.
- C-112: Hi-Potion - 1st split path, 1st dead end.
- C-113: Hi-Potion - 1st split path, 2nd dead end.
- C-114: Ether - 2nd split path, bottom.
- C-115: Spider Silk - 3rd split path, bottom-left corner.
Take the exit (A) to B2.
- C-116: Sleepgrass - Top-left corner.
Then take the exit (B) just below the chest to B3.
- C-117: Spider Silk
Take the exit (C) to B4. Then take the north exit (D) to 1F.
This floor is full islander people wearing masks. If you look closely, There are 2 people wearing green masks; those are merchants who sell some basic items and weapons.
I highly recommend you buy 4 "Ruby Cuirass" and equip on everyone immediately. It has high defense without sacrificing to much Evasion and Magic Interference stats.
Backtrack to B2 (B).
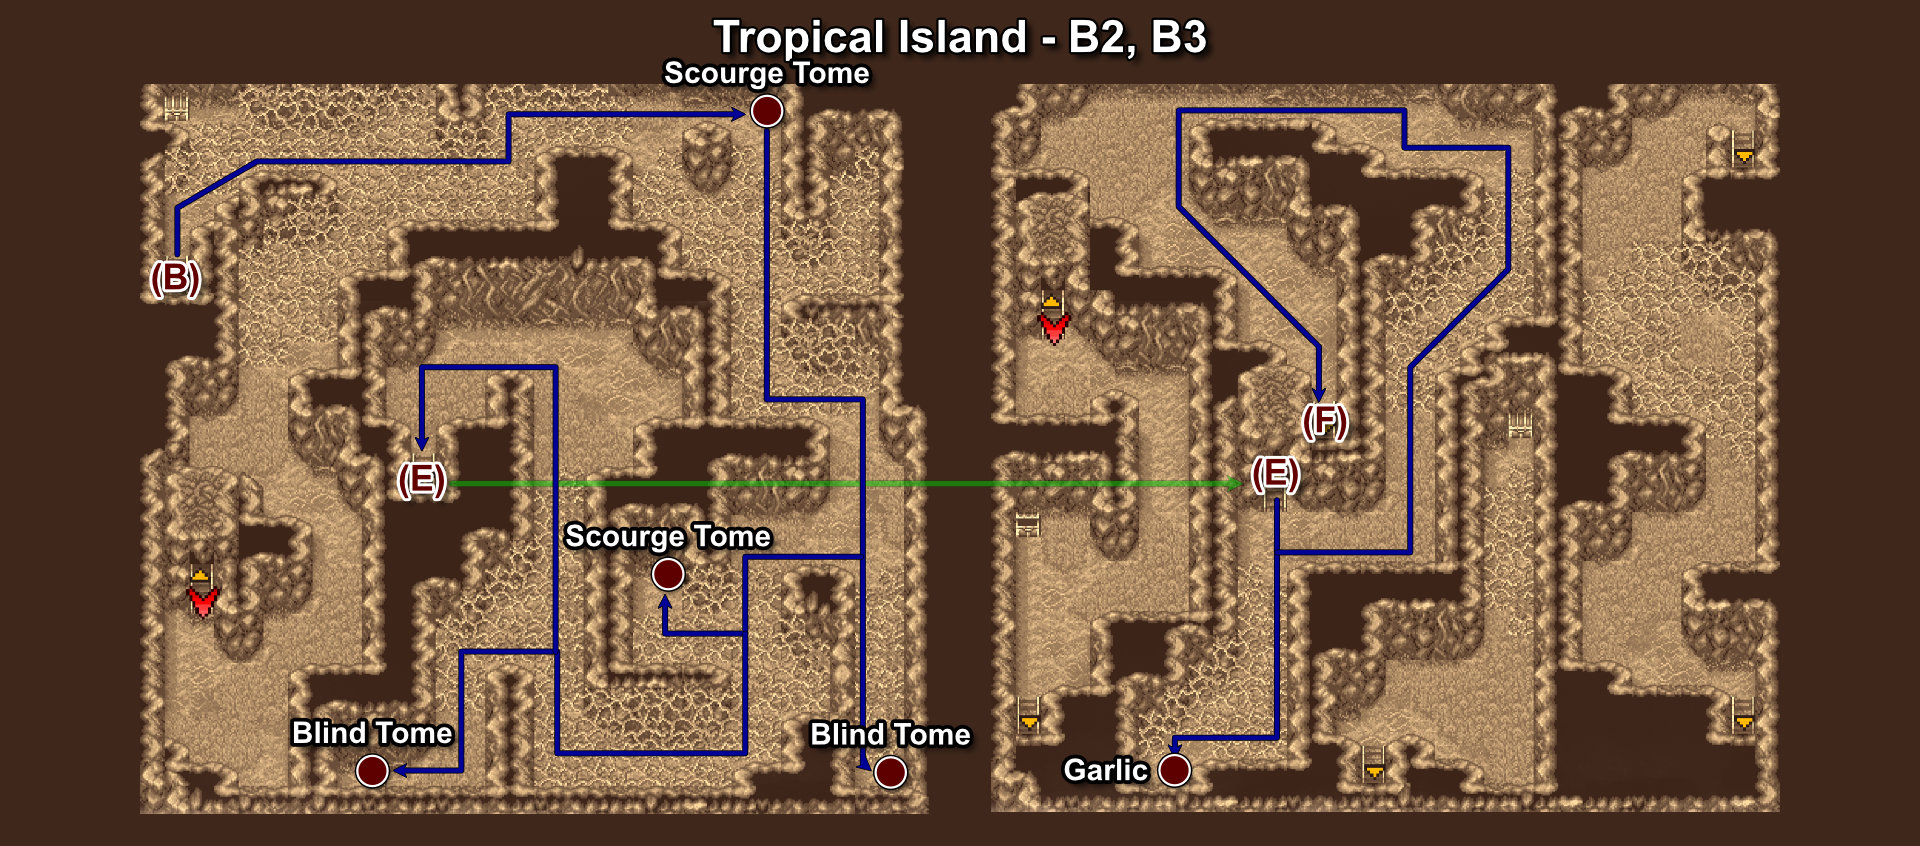
- C-118: Scourge Tome - Top-right corner.
- C-119: Blind Tome - Bottom-right corner.
- C-120: Scourge Tome
- C-121: Blind Tome - Bottom-left corner.
Take the exit (E) to B3.
- C-122: Garlic - Bottom chest.
Go north then exit (F) to B4.
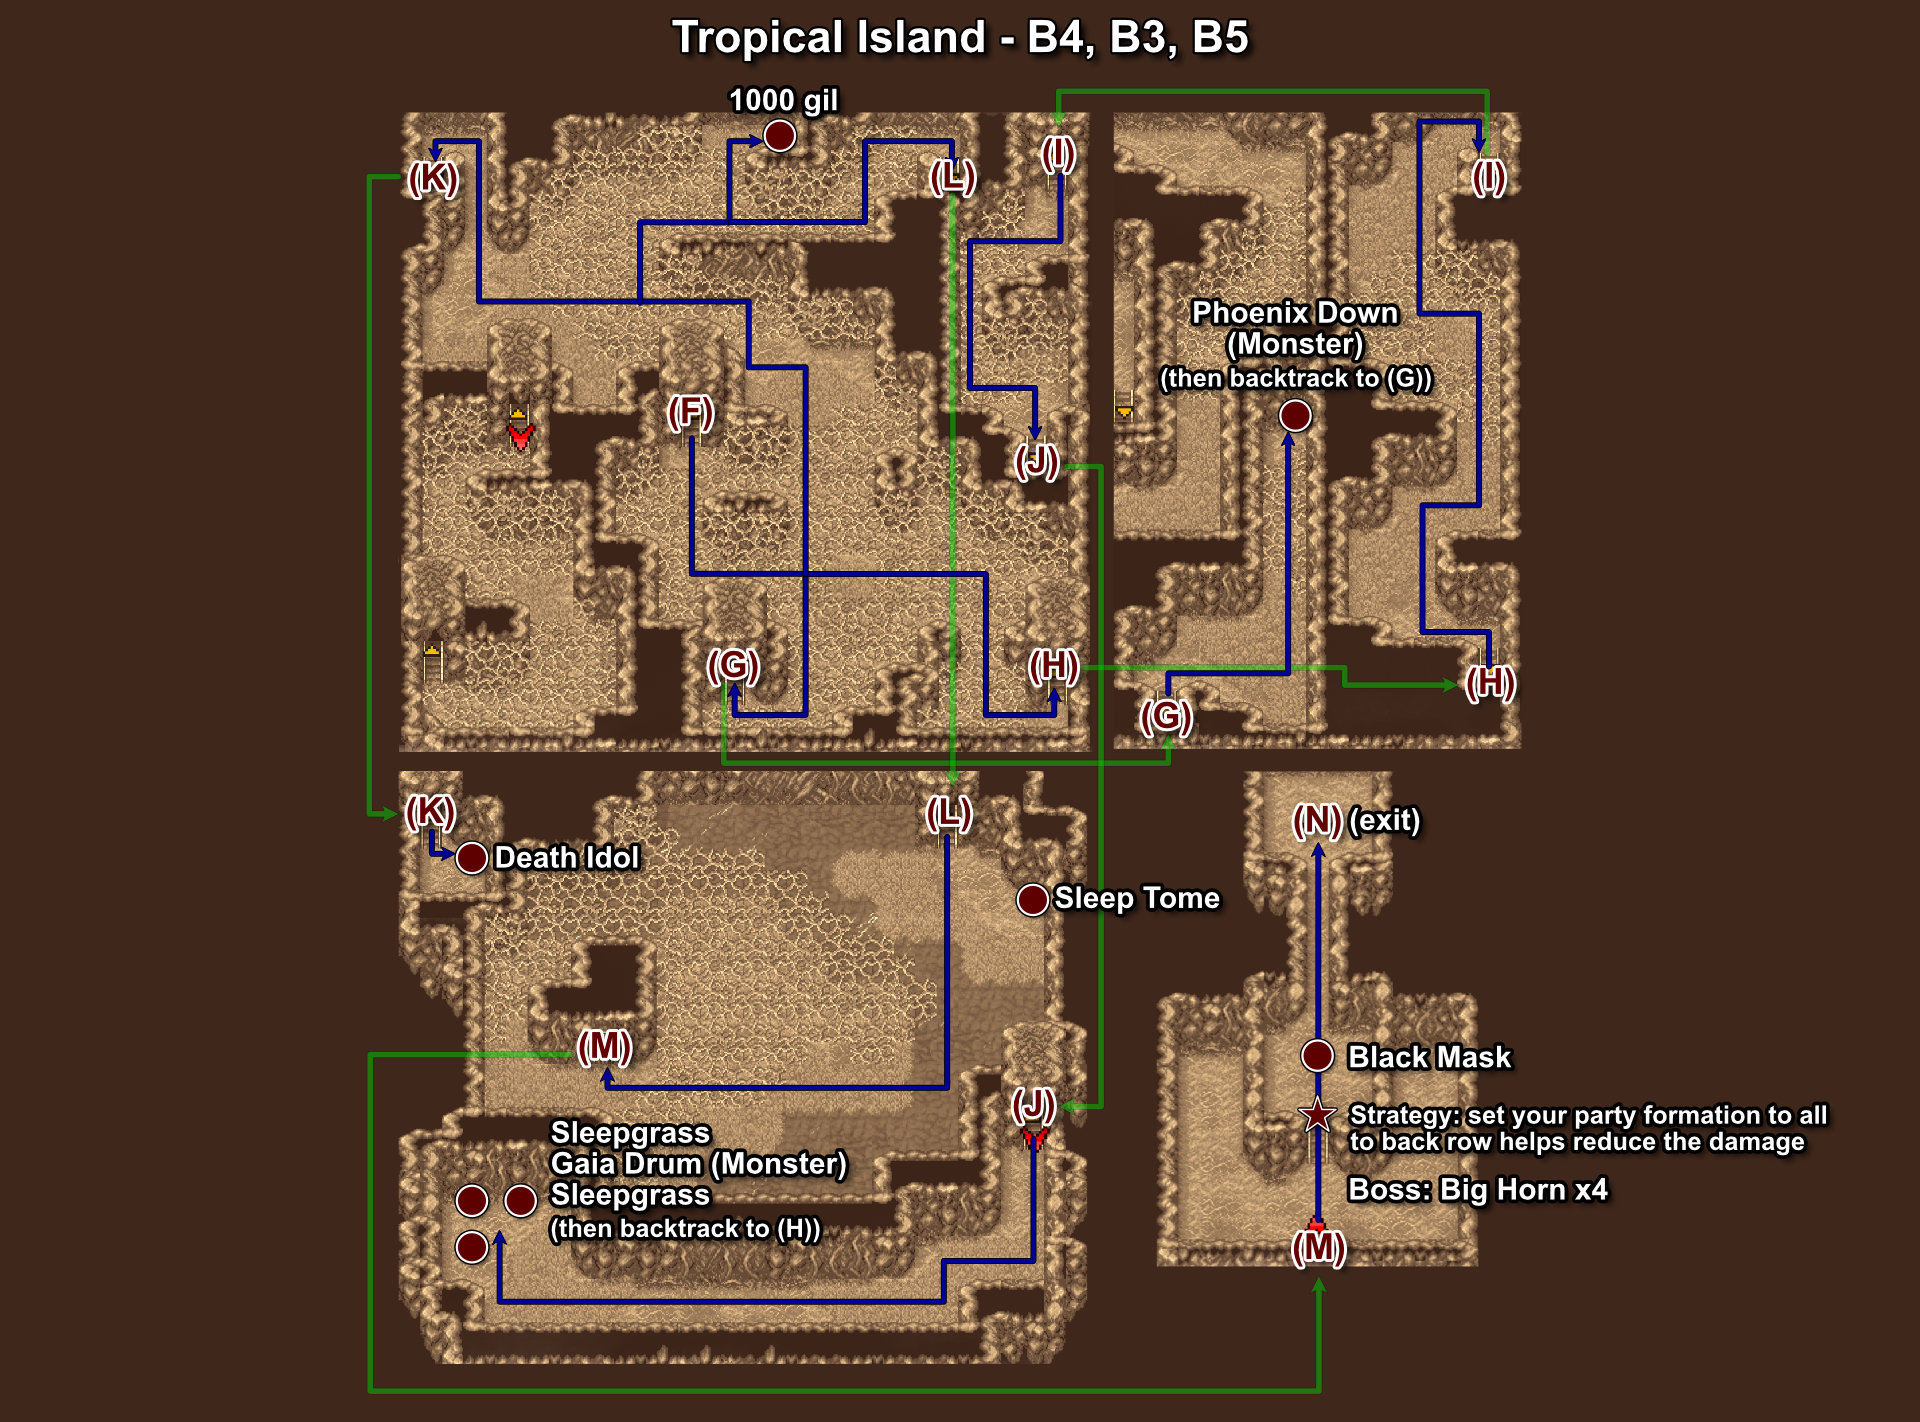
Take the bottom-left stairs (G) lead to B3:
- C-126: Phoenix Down (Monster) Monsters: Ghast x2, Ghoul x2, Wraith x2, Shadow x2
Backtrack to B4 (G), take the bottom-right stairs to B3 (H) -> B4 (I) -> B5 (J). In the bottom-left corner has 3 chests:
- C-123: Sleepgrass - Bottom chest.
- C-124: Gaia Drum (Monster) - Top-left chest. Monsters: Wild Horn x2, Poison Toad x2
- C-125: Sleepgrass - Top-right chest.
Backtrack to B4 (H) then take the top-left stairs (K) lead to B5:
- C-127: Death Idol
Backtrack to B4 (K), then pick up the top chest.
- C-128: 1000 gil
Finally, take the top-right exit (L) to B5:
- C-129: Sleep Tome - To your right.
Enter the room (M) to your left. IMPORTANT: make a quick save before fighting the boss.
These guys can be a real pain at your current level. I recommend you set your party formation to the back row. This will reduce physical damage taken, and we'll keep this formation until we clear the next dungeon.
Boss: Big Horn x4
Strategy: Keep attacking them with your barehand, while Leila uses her level 4 Thunder, heal up when you are low. Repeat until you win.
- C-130: Black Mask
Step on the portal (N) at the top to exit.