There is no boss in this dungeon, so enjoy looting all the good stuff in here. However, be careful with the 4 trap chests with monsters - they are super strong. You probably want to take this opportunity to level up your characters.
Follow the map to the cave, then collect everything inside. Once you are done, use Teleport to get out.
Tip: equip new weapons/armor as soon as you get them. Also, use quicksave before opening trap chests.
Bestiary Checklist:
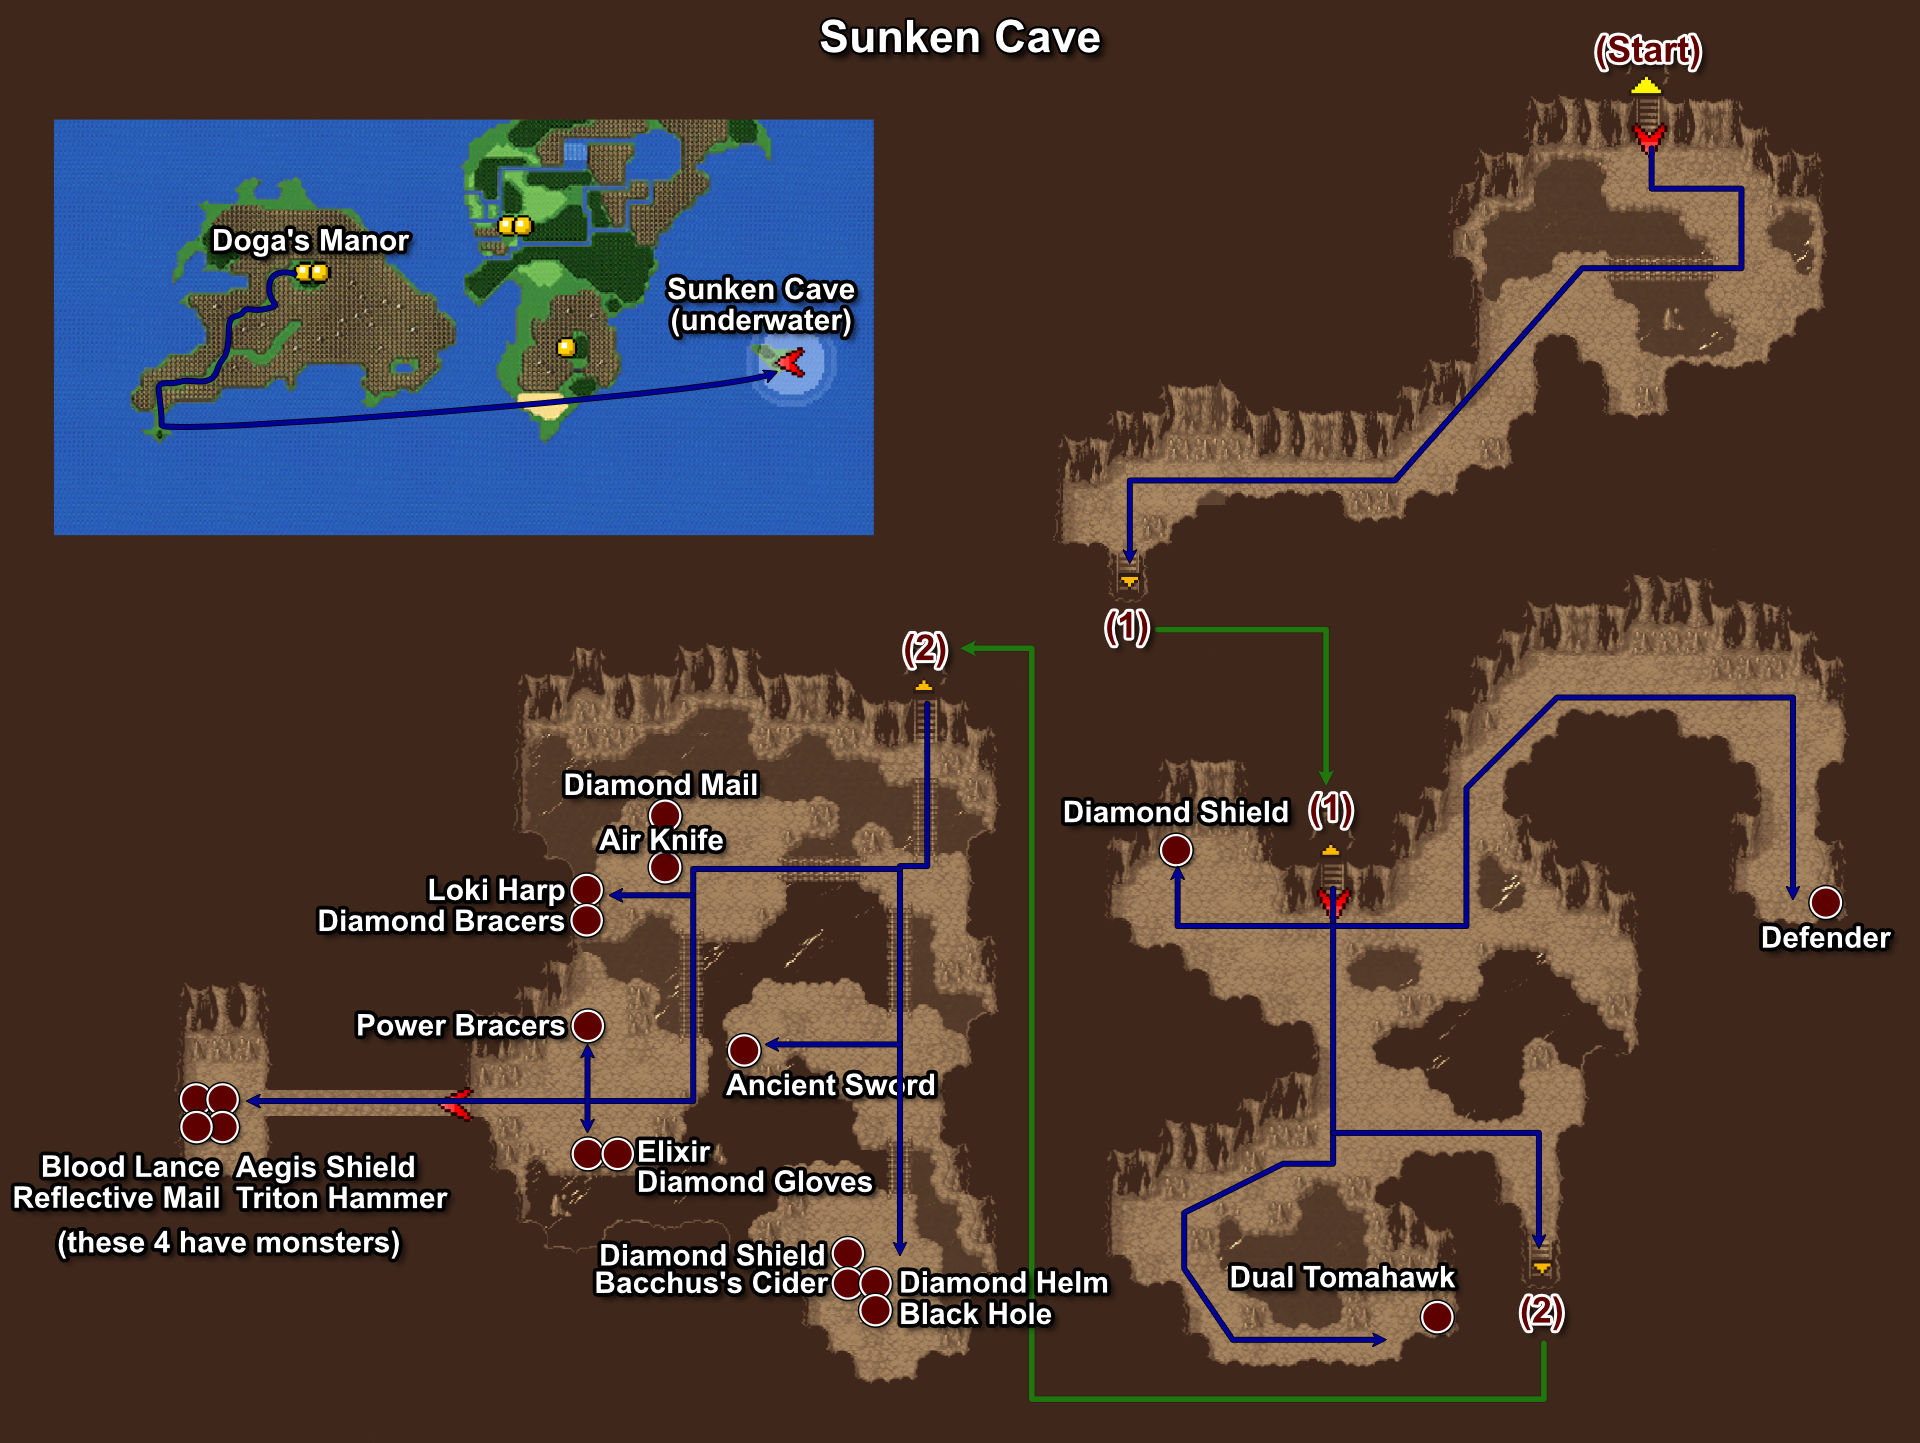
Chests/Items:
- C-209: Defender - B2, chest in the top-right corner.
- C-210: Diamond Shield - B2, chest in the top-left corner.
- C-211: Dual Tomahawk - B2, bottom chest.
- C-212: Ancient Sword - B3, 2nd bridge to the south.
- C-213: Diamond Shield - B3, 3rd bridge south, top chest.
- C-214: Bacchus's Cider - B3, 3rd bridge south, middle-left chest.
- C-215: Diamond Helm - B3, 3rd bridge south, middle-right chest.
- C-216: Black Hole - B3, 3rd bridge south, bottom chest.
- C-217: Diamond Mail - B3, 2nd bridge west, top chest.
- C-218: Air Knife - B3, 2nd bridge west, bottom chest.
- C-219: Loki Harp - B3, 2nd bridge west, top chest next to the wall.
- C-220: Diamond Bracers - B3, 2nd bridge west, top chest next to the wall.
- C-221: Power Bracers - B3, 3rd bridge west, top chest.
- C-222: Elixir - B3, 3rd bridge west, bottom-right chest.
- C-223: Diamond Gloves - B3, 3rd bridge west, bottom-left chest.
- C-224: Aegis Shield (Monster) - B3, far-west hidden area, top-right.
Monsters: Zombie Dragon - C-225: Blood Lance (Monster) - B3, far-west hidden area, top-left.
Monsters: Peryton - C-226: Triton Hammer (Monster) - B3, far-west hidden area, bottom-right.
Monsters: Eater x3 - these guys can be a pain because they replicate very quickly. - C-227: Reflective Mail (Monster) - B3, far-west hidden area, bottom-left.
Monsters: Death Claw x2